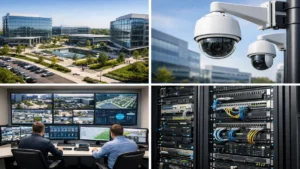
Security in corporate environments is no longer limited to installing cameras at entrances and hoping for the best. Today’s corporate offices, IT parks and multi-building campuses need CCTV systems that can do much more:
- Capture clear evidence during incidents
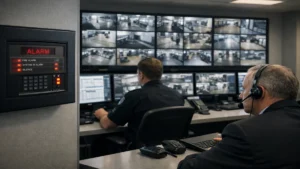
- Help security teams respond faster
- Support visitor control and compliance
- Reduce theft, trespassing and tampering
- Keep coverage stable across large areas
But here’s the truth: most people learn after a failed project.
CCTV is not a product purchase. It is a planning and engineering exercise.
This guide explains CCTV planning from the ground up without confusing jargon, so facility managers, consultants, integrators and engineers can design systems that actually work in real conditions.
Why CCTV Planning is Different for Corporate & Campus Sites
CCTV planning in offices and IT parks is more complex than malls or homes because:
- Multiple entrances and exits
- High footfall during peak hours
- Privacy and workplace compliance rules
- Network policies and cybersecurity restrictions
- Multiple buildings and long cable distances
- Investigations need usable footage, not just “video”
- Expansion is expected every year
So the goal is not “more cameras.”
The goal is the right cameras in the right locations with the right image clarity.
Step 1: Define What You Want CCTV to Achieve
Every successful CCTV project starts with clarity on outcomes.
The 4 real CCTV goals
- Detect – Notice movement or intrusion
- Observe – See activity patterns clearly
- Recognise – Recognise a face or uniform in mid-range
- Identify – Confirm identity with evidence-level clarity
If you skip this, you will end up with footage that looks okay on a monitor but becomes useless during investigations.
Example:
A wide-angle camera in a lobby can observe movement, but it may not identify faces.
Step 2: Map the Site Like an Engineer (Zone Planning)
For corporate offices, IT parks and campuses, coverage needs zoning.
Zone A: Critical & high-risk areas
These must always deliver clear footage:
- Main gate entry/exit points
- Reception and visitor desk
- Lift lobbies and staircase access points
- Server room / UPS room / MDF & IDF rooms
- Parking entry lanes
- Loading-unloading bays
- Perimeter wall & restricted zones
- Emergency exits
Zone B: Medium-risk areas
- Department corridors
- Internal connecting passages
- Cafeteria and common areas
- Main lobby waiting areas
Zone C: Low-risk monitoring
- Decorative spaces
- Areas without sensitive assets
This zoning helps you design a system that is cost-effective and practical.
Step 3: Understand Camera Types for Corporate Use
Many CCTV projects fail because planners choose the same camera type everywhere.
1) Dome cameras (Best for indoor corporate spaces)
Best areas:
- Reception
- Corridors
- Lift lobby
- Office interiors
Why: - Clean look
- Difficult to tamper with
- Wide-angle monitoring
2) Bullet cameras (Best for outdoor and long-range)
Best areas:
- Perimeters
- Parking lanes
- Building exteriors
Why: - Strong IR night vision
- Long-distance coverage
- Easy direction control
3) PTZ cameras (For active monitoring, not replacement)
Best areas:
- Main gates
- Large open grounds
- Long driveway areas
Why: - Zoom-in tracking
Reality: - They are controlled by operators, so coverage depends on where the PTZ is pointing.
4) Multi-sensor cameras (Wide areas with fewer devices)
Best areas:
- Atriums
- Large lobbies
- Building corners
Why: - 180° or 360° style coverage
- Fewer installations for large zones
Step 4: Choose Resolution the Smart Way (Not “Higher is Always Better”)
Resolution affects:
- Face clarity
- Storage load
- Network bandwidth
- Recording stability
Recommended resolution plan for corporate sites
2MP (1080p) – Corridors, general monitoring
4MP – Best overall balance for most areas
8MP (4K) – Entry gates, critical zones, long distance
Practical advice:
Use 4MP as your standard and deploy 8MP only where you truly need identity capture.
Step 5: Lens Selection (The Real Secret of Good Footage)
A high-resolution camera with the wrong lens still gives poor evidence.
Simple understanding:
- 2.8mm lens = Wide angle (captures more area, less detail)
- 3.6mm lens = Balanced view
- 6mm lens = Narrower view (captures less area, more detail)
- Motorised varifocal lens = Adjustable field-of-view for perfect framing
In corporate CCTV planning, varifocal cameras are extremely useful at entrances, corridors and gates.
Step 6: Best CCTV Placement Strategy for Corporate Offices
This is where planning turns into real engineering.
A) Main Gate Cameras (IT Parks & Campuses)
Your gate is your highest-value CCTV point.
You should capture:
- Visitor vehicle entry
- Vehicle number plate (where required)
- Pedestrian entry lane
- Security cabin interaction
- Boom barrier operation
Recommended layout:
- 1 wide-angle camera for overall lane monitoring
- 1 tight-angle camera for face capture
- 1 dedicated camera for plate capture (optional, depends on use case)
A single wide camera cannot deliver face clarity + number plate clarity together.
B) Reception & Lobby (Most Incidents Start Here)
The reception needs a face capture.
Best practices:
- Mount the camera at a face-level angle (not too high)
- Prefer cameras with WDR to handle bright entrances
- Cover the approach direction, not just the sitting area
Ideal setup:
- 1 camera covering the entrance flow
- 1 camera covering reception desk interaction
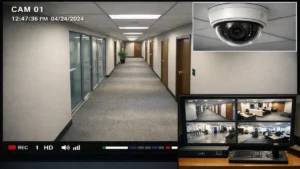
C) Corridors & Floor Movement Areas
Corridors are movement trails.
Placement rules:
- Cover corridor junctions
- Cover entry to each zone
- Avoid “one camera for a long corridor” thinking
- Ensure face visibility when people walk naturally
Engineers often use this method:
“Coverage from decision points”
Decision points are where people choose a direction, lift lobby, corridor junction, or staircase entry.
D) Lift Lobbies and Staircases
These are access control zones even without access control systems.
Coverage must include:
- Lift opening area
- People entering/exiting the lift
- Staircase entry/exit doors
If staircases have emergency exits, record them clearly to detect misuse.
E) Server Room / MDF / UPS Room (Critical Surveillance)
These zones must always have evidence-quality footage.
Minimum recommended:
- 1 camera outside the door for face capture
- 1 camera inside for activity monitoring
Extra layer:
- Restrict playback access to IT/security heads
- Keep higher retention days here
Step 7: Parking Surveillance That Actually Works
Parking is where most complaints happen:
- Vehicle scratches
- Theft
- Unauthorized entry
- Disputes
Parking planning must include:
- Entry/exit points
- Pedestrian walkway to the building
- Parking zone coverage (by section, not every slot)
- Ramp monitoring
Best approach:
- Divide parking into zones
- Cover each zone with 2–4 cameras
- Add a PTZ only if you have staff to monitor it
Step 8: Perimeter CCTV Planning for Campuses
Perimeter planning should prevent:
- Intrusion
- Boundary climbing
- Unauthorised movement after hours
Placement logic:
- Use overlapping views
- Avoid long blind stretches
- Mount at the proper height to prevent vandalism
- Ensure night IR coverage is tested
Optional upgrades for large campuses:
- Smart intrusion analytics in restricted zones
- Thermal cameras for high-risk boundary stretches (advanced)
Step 9: Storage Planning (Retention, FPS, and Compression)
Storage planning must be accurate, or you will face these issues:
- NVR running out of space
- Missing footage when needed
- Low quality recording forced by settings
Recording settings that work well in corporate sites
- Indoor corridors: 10–15 FPS
- Main entry gates: 15–25 FPS
- Parking: 12–15 FPS
- Perimeter: 15 FPS
- Server room zones: 15 FPS
Compression recommendation
Use H.265 wherever possible for better storage efficiency.
Retention guidance
- Offices: 15–30 days
- IT parks: 30–90 days
- High-security sites: 60–120 days (as per internal policy)
Always keep 15–20% spare storage capacity for expansions and bitrate variations.
Step 10: Network Design (The Most Ignored CCTV Topic)
In corporate environments, CCTV must work smoothly without affecting the office internet.
Best CCTV networking practices
- Keep CCTV in a separate VLAN
- Use managed PoE switches
- Avoid connecting cameras to random LAN ports
- Use a fibre backbone between buildings
- Sync time using NTP for correct timestamps
- Restrict IP access with firewall rules
PoE considerations
- Standard PoE works for normal cameras
- PoE+ is needed for PTZ, IR-heavy units and heaters
A clean network plan avoids lag, frame drops and recording issues.
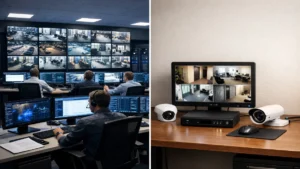
Step 11: VMS vs NVR (What’s Best for IT Parks?)
NVR-based systems
Best when:
- One building
- Limited cameras
- Basic monitoring needed
VMS-based systems
Best when:
- Multi-building campus
- Centralized monitoring
- Scalable storage
- Advanced user roles
- Analytics integration
For IT parks and campuses, VMS is usually the smarter long-term choice.
Step 12: Cybersecurity & Privacy in Corporate CCTV
CCTV is part of your digital infrastructure.
CCTV cybersecurity checklist
- Change default usernames/passwords
- Strong password policy
- Restrict camera access to specific users
- Disable unused ports and services
- Update firmware regularly
- Avoid open cloud access unless required
- Log playback and user access events
Privacy rules that protect your organisation
- Don’t point cameras directly at employee screens
- Never place cameras in washrooms/changing areas
- Add CCTV signage in public zones
- Mask sensitive areas if required
Good CCTV planning improves security without making workspaces uncomfortable.
Step 13: Smart Analytics That Add Real Value
Analytics should solve a real problem. Otherwise, it becomes a “feature” nobody uses.
Most useful analytics for corporate sites:
- Intrusion detection after office hours
- Line crossing alerts at restricted zones
- Loitering near gates and perimeters
- People count at entry points
- Vehicle presence alerts near loading bays
Engineers should always test analytics in real conditions because:
- Lighting
- Angle
- Motion patterns
Directly impact performance.
Step 14: Maintenance Plan (Your CCTV System’s Lifeline)
CCTV failure is often caused by poor maintenance, not poor products.
Corporate CCTV maintenance checklist
- Clean lenses quarterly (outdoors more frequently)
- Check night IR performance
- Verify focus and camera angles
- Test playback from random cameras
- Monitor HDD health
- Verify UPS backup
- Update firmware & VMS patches
- Ensure camera naming and labelling are consistent
Sample CCTV Planning Blueprint (Corporate + IT Campus)
Here is a reliable baseline structure.
Office building
- Reception: 2–4 cameras
- Corridors per floor: 4–10 (based on layout)
- Lift lobbies: 2–4
- Staircases: 2–6
- Server/MDF/UPS rooms: 2 each
Outdoor areas
- Main gate: 3–6 cameras
- Parking: 8–25 cameras (based on size)
- Perimeter: based on spacing & lens
- Loading bays: 2–4 cameras
This method ensures balanced coverage without overspending.
What You Should Remember Before Finalising Your CCTV Plan
A corporate CCTV system succeeds when it has:
- Correct placement for identity capture
- Stable recording without frame drops
- Proper storage retention
- Clean network architecture
- Cybersecurity controls
- Maintenance plan from day one
When you design CCTV with this mindset, you get a system that is not only “installed” but trusted and reliable when it matters.
Read Also: Enterprise CCTV Network Architecture: What IT Teams Expect
Read Also: Why CCTV Systems Are Becoming More Network Projects Than Security Projects